

___________________________________________

Kimba hosts this fun "DIY Day" party every week at "A Soft Place To Land". She has a super inspirational blog.
__________________________________________
"The Shabby Chic Cottage" is the location of "Transformation Thursday", another creative party. Hostess Gina would love to have you join her, too.
* * * * * * *These parties get started on Wednesday nights.* * * * * *
_____________________________________________
We custom built Blue Creek Home five years ago on a lot at Lake Martin.
I spent a lot of time dreaming, brainstorming, designing and working with a home planner on the floor plan.
As construction started and progressed, there were a few things that had to be changed. (don't you love that change order charge?)
One such change occurred in the very short hallway that connects the main living area to the guest bedroom, laundry room, and basement staircase. The hall is oddly shaped. It is U-shaped with the sides angled out - like three sides of an octagon.
The original plans called for an area to house part of the HVAC system. When we had to relocate it, we were left with a perfectly usable 9 sq. ft. floor space... in a triangle shape!
After kicking around a lot of ideas, we created a niche in the upper portion of the space. We had a false back added to reduce the depth of the deep triangle corner.
The bottom section of the space was utilized as a much needed storage area in the adjoining powder room.
It worked out beautifully. But, then we had an oddly shaped niche, in a high traffic area, visible from the living area, and no idea in sight!
For the first two years, it remained bland and naked, just begging to be dressed up.
After much thought, I decided to paint a mural. I thought about it for months before deciding that an Italian style view was exactly what this area needed.
After much more thought, I finally got the nerve to start working on it!
I knew that this was going to take a while and that it would break my heart to leave it behind if we ever moved. So, I decided to paint it on canvas.
I taped the canvas to the dining room wall and went to work. I had Alex help some when she came over.
It was relatively easy to attach to the wall. I folded under the front edges and used a staple gun to secure it to the wall. I painted the staples to blend with their surrounding area.
I did a paint finish directly onto the bottom surface and applied several coats of varnish for durability.
There is an electrical outlet inside the niche. One day I would love to have a little bitty chandelier hanging from the ceiling inside the niche.
I don't have any photos of the before niche.
But, I have lots of after photos of the mural.
After photos are the best part of a make-over anyway!
___________________________________________

The niche, with a pair of vintage blackamoors, a footed planter that I refinished and filled with dried hydrangea, eucalyptus, feathers, and pepper berries.
______________________________________________

This is the flat usable surface inside the niche
I adore the little feet on the planter
______________________________________________

Pepper berries and vintage blackamoor
_________________________________________

Peeking through eucalyptus at the details of the wrought iron atop the privacy gate
_____________________________________________

Concrete column detail
_____________________________________________

Details of the door header
I think these are made of local Italian stones...probably found on the very land where this villa is located!!! Each one seems to be carved to fit perfectly against the curved top of the blue carriage house doors.
__________________________________________

Corner of cozy terra cotta main house - I would love to see the interior details!
___________________________________________

Entrance to mural!
_________________________________________

I purchased these vintage blackamoors on E-Bay
Unfortunately, I don't have bragging rights to a great price for them!
__________________________________________

I love, love, love to use pepper berries in my floral arrangements
___________________________________________

Three of my favorite things: vintage blackamoor, dried hydrangea, and pepper berries
________________________________________________

A broader view of mural
______________________________________________

Installing this decorative header was no easy feat. I spent a lot of time cutting, fitting, caulking, and painting it to match the surrounding wall.
I think it finished the area nicely.
______________________________________________

This footed planter was a TJ Maxx $10.00 sale purchase. The original finish was a really bad faux concrete. I refinished it, and added lots of - rotten stone.
Ya'll thought it was dust, didn't you???
___________________________________________

More details
__________________________________________

And more...
______________________________________________

I love the privacy gate - I bet it is breathtaking inside!!
________________________________________

This area serves as a very pretty wine service area when everything is removed
____________________________________________

View from the living area
_____________________________________________
I hope you enjoyed the private tour of my Italian mural.
I certainly loved having you here.
Rhonda


GORGEOUS!!! You never cease to amaze me!!! You take what others would see as impossible and turn it into an absolute work of art...you are a genius...I know I have said it before...but it is true!!!
ReplyDeleteI am IN LOVE with the blackamoors...they are one of my favorite collectibles...great minds think alike!!! I just bought a blackamoor lamp...he needs a shade...but I still love him;)!!! The flower arrangement is to die for...I love dried hydrangea and pepper berries too...a winning combination!!!
I love the space you have created!!! Job well done!!!
Enjoy!!!
XOXO
Cathy
Well done! You are very talented!
ReplyDeleteOh wow, what gorgeous pics! You are very artistic and created something fabulous~ Cindy
ReplyDeletewho cares about before photos when the after is this wonderful!!!! how talented are you!
ReplyDeleteLove it all...uh, about the Blackamoors...there are some that would take offense.
ReplyDeleteYou did an incredible job on this. Loved seeing all the details. It's perfect! ~ Sarah
ReplyDeleteSweet feet! Hope to have a vacation home on Lake Martin one day to spend weekends in the Fall...and Saturdays in Auburn!
ReplyDeleteIt is absolutely beautiful! I love all the details!!!!!!!!
ReplyDeleteWhat is the header made of? It looks like lincrusta.....
Alyshia
Where could you find styrene (sp?)? I absolutely love this whole look. The hydrangea, the feathers, the dusty planter :)
ReplyDeleteAnd I must have missed the cloche post. I am in awe of the one with antlers and peacocks. Love the peacock. What an interesting mix of materials. So cool.
Alyshia
Hi Rhonda -
ReplyDeleteThanks for coming over - so nice to meet you.
Love your writing, photos, and dogs and granddogs!
Lucky you - I know I'll have to go back and read to catch up, but is this #1 grandchild for you?
I'm following you too -
Marsha
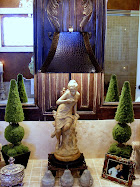
hmmmm why am i called About Me? I'm chandelier magic - beach house.
ReplyDeleteAlways trouble!
Hi Rhonda,
ReplyDeleteOh my, absolutely beautiful! You are so talented.
Gail
Happy New Year my blogging friend!
ReplyDelete